Steps to take:

  1. Install your eSIM the day before you leave for travel and activate during your flight or when you arrive at your destination. 
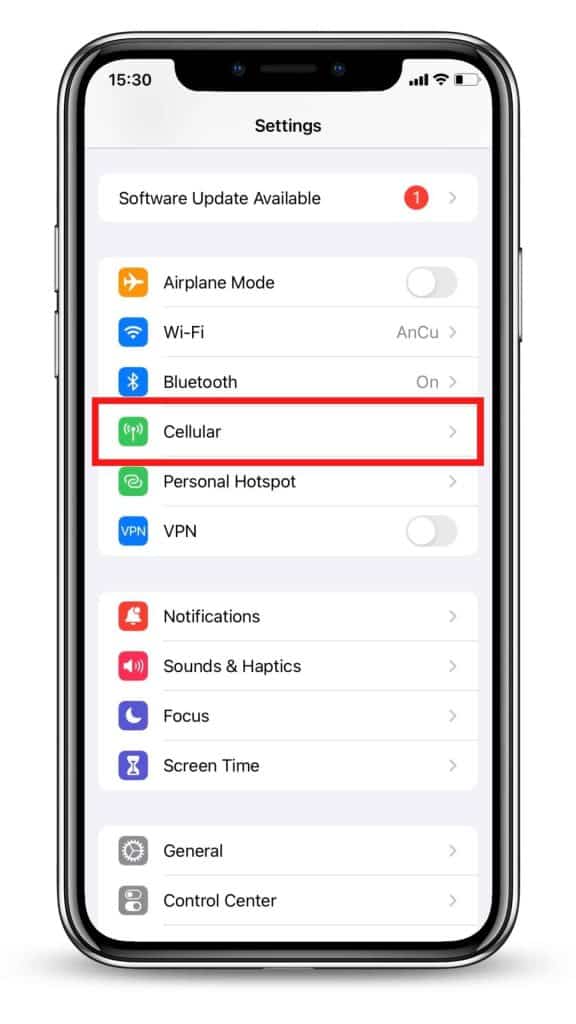
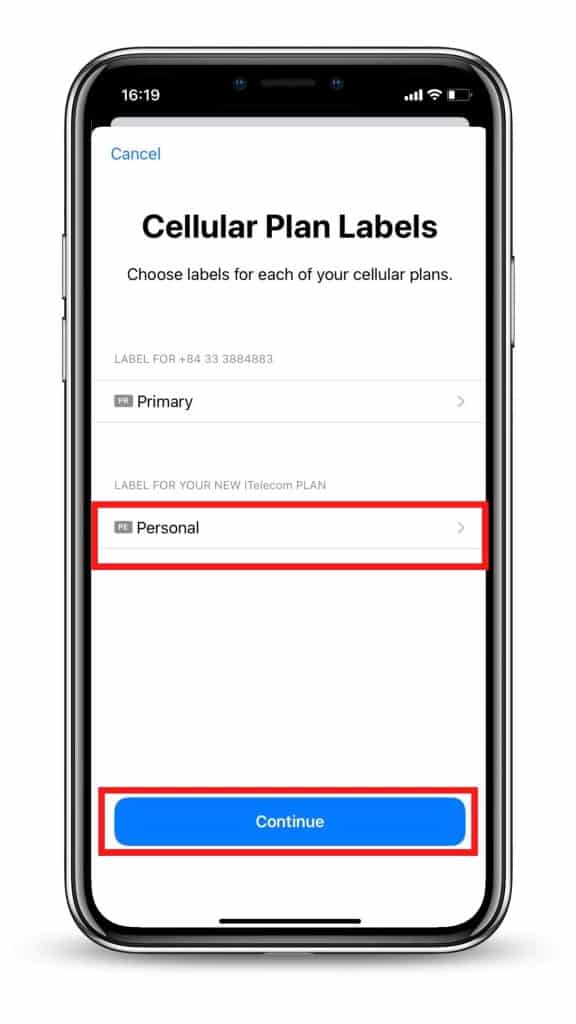
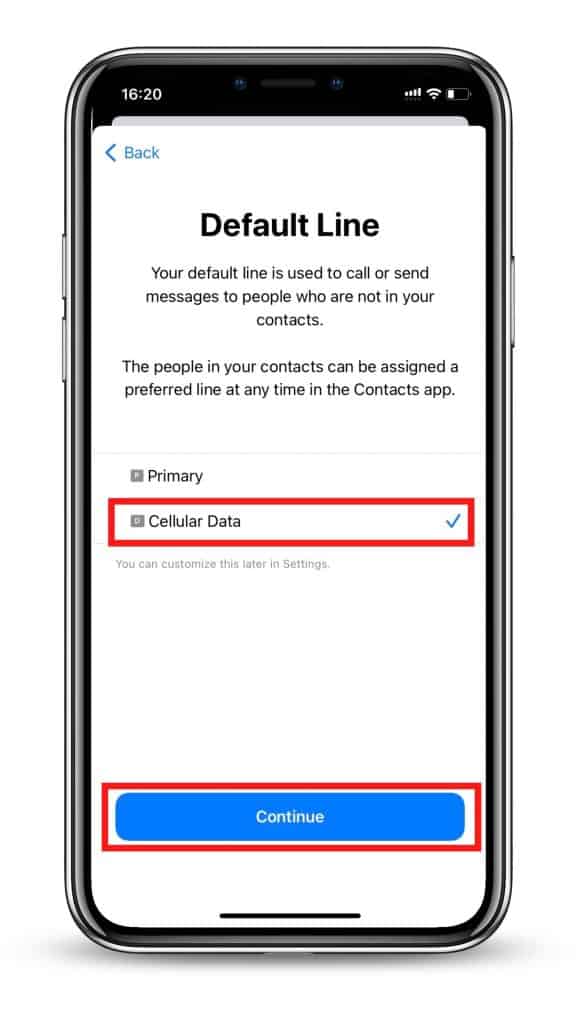
  2. Select the type of device on which you are going to install an eSIM on (iPhone, Samsung, Google Pixel)
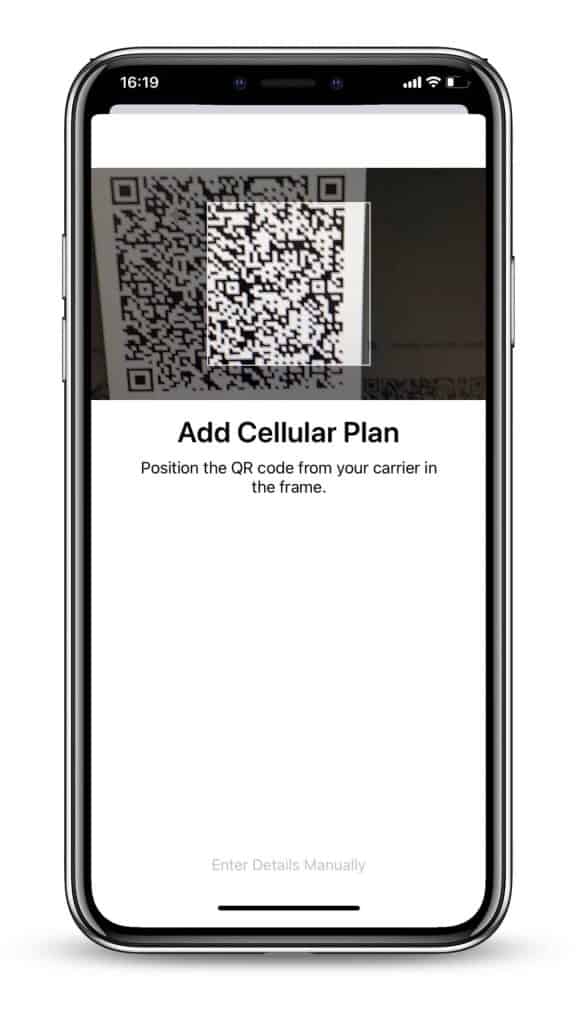
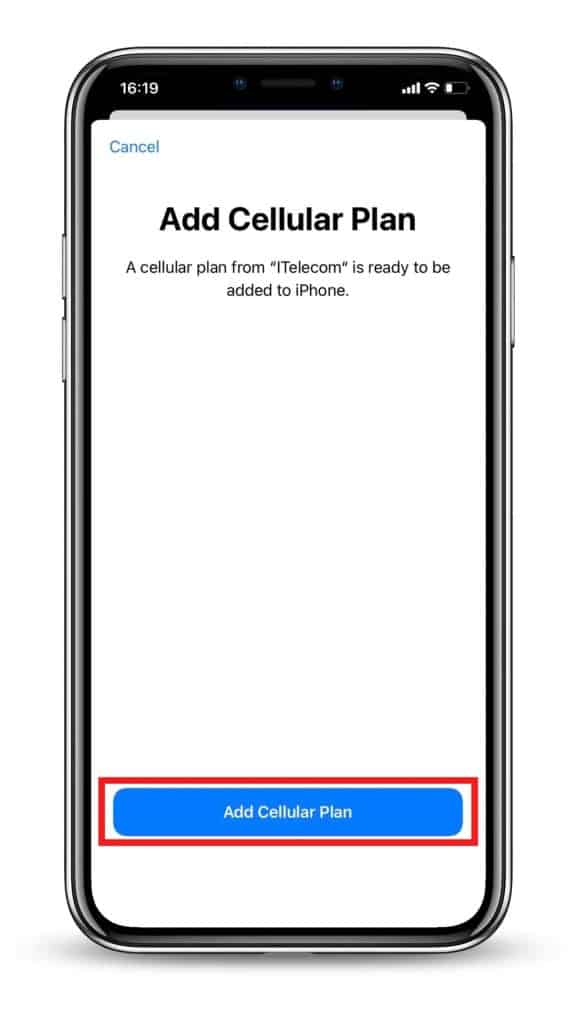
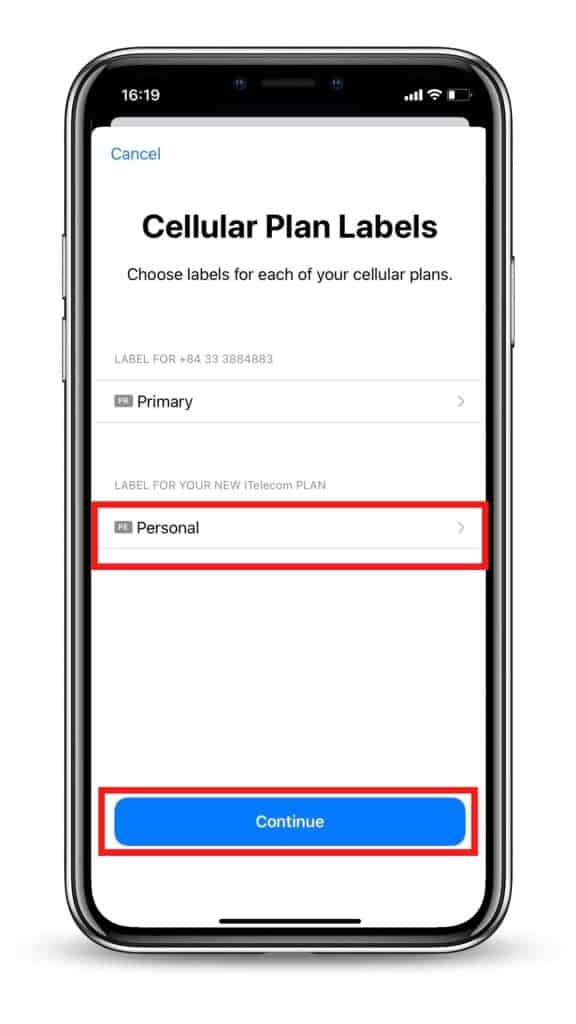
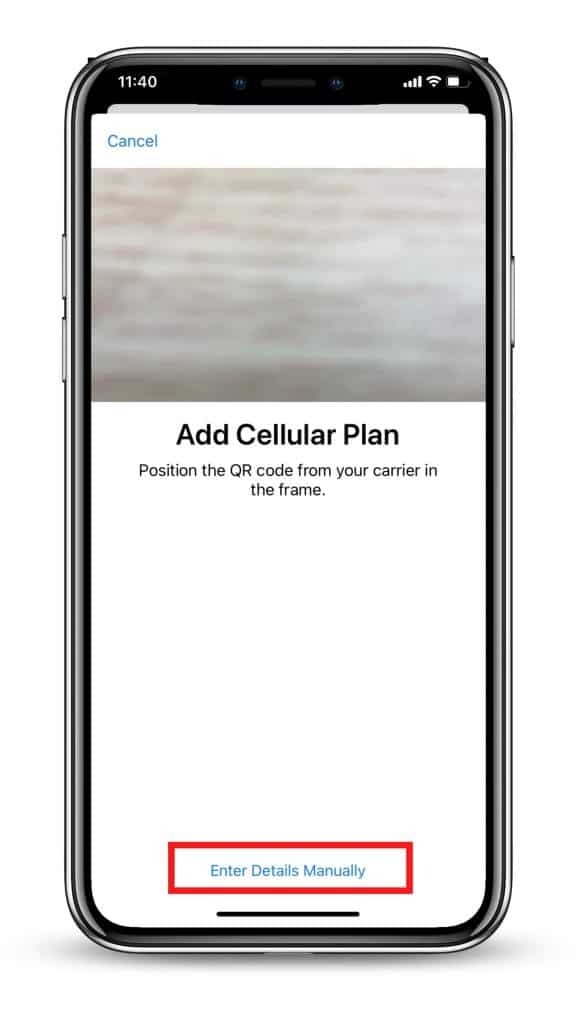
  3. Follow QR code installation if you have the code on another device to scan
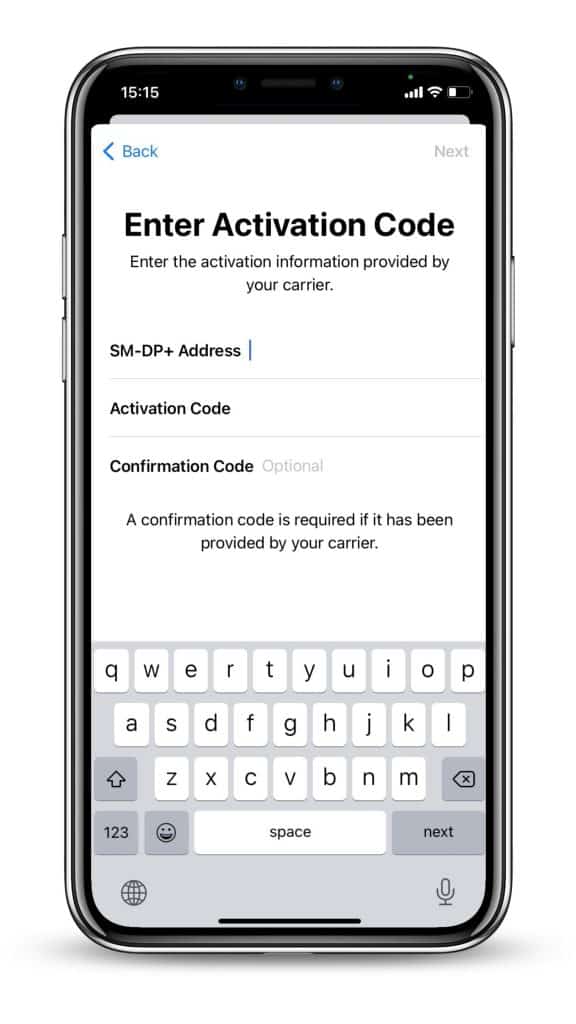
  4. Follow the Manual Installation if you are unable to scan the QR code. 

Select the device which you are going to install an eSIM on

iPhone Samsung Google Pixel

There are 02 ways of installing an eSIM on iPhone: Installation with QR code and Manual Installation. See each one step-by-step below:

Need to know before carrying out eSIM installation and activation on iPhone:

  • Ensure your device is eSIM-compatible and carrier-unlocked. Check out if your iPhone supports eSIM.
  • You must have the QR Code on another screen or device or a printed paper to scan it with your phone camera.
  • Ensure that your internet connection remains stable throughout the entire proces
  • The QR code or manual installation can only be done once.
  • DO NOT remove the eSIM from your device because it cannot be used again. 

Steps to installl and activate your eSIM

  • Step 1: On your iOS device, go to Settings > Cellular.
  • Step 2: Select Add Data/Cellular Plan/Add eSIM.
  • Step 3: Scan the eSIM QR code that you have received.
  • Step 4: Choose Add Cellular Plan button to save the eSIM details.
  • Step 5: On the screen named Cellular/Mobile Data Plan Labels, select the available label (like Secondary, Business, Travel,… ) or Label your eSIM profile as you want (i.e. Singapore eSIM), and tap Continue.
  • Step 6: Set your eSIM profile as the Default Line (if your data eSIM comes with a phone number) or select your Primary number if your data eSIM does not come with a phone number), then choose Continue.
  • Step 7: Set your eSIM profile as the default Cellular Data > choose Done.
  • Step 8: Turn on Data Roaming to start using your eSIM. (We recommend you to do this when you arrive at your destination).
Step 1: Settings > Cellular
Step 2: Add Cellular Plan/ eSIM
Step 3: Scan eSIM QR code
Step 4: Add Cellular Plan
Step 5: Label your eSIM profile
Step 6: Set up your Default Line
Step 7: Set your eSIM as the default Cellular Data
Step 8: Turn on eSIM's Data Roaming

Manual Installation

Steps to install your eSIM manually

  • Step 1: On your iOS device, go to Settings > Cellular.
  • Step 2: Select Add Data/Cellular Plan.
  • Step 3: If you cannot scan the QR code sent by your eSIM provider due to a certain reason, you can still activate your eSIM manually by selecting Enter Details Manually.
  • Step 4: Enter the required information including
    • SM-DP+ Address
    • Activation Code
    • Confirmation Code (if required)
    • Then, select Next.
  • Step 5: On the screen named Cellular/Mobile Data Plan Labels, select the available label (like Secondary, Business, Travel,… ) or Label your eSIM profile as you want (i.e. Singapore eSIM), and tap Continue.
  • Step 6: Set your eSIM profile as the Default Line (if your data eSIM comes with a phone number) or select your Primary number if your data eSIM does not come with a phone number), then choose Continue.
  • Step 7: Set your eSIM profile as the default Cellular Data > select Done. Switch off the Allow Cellular Data Switching to avoid roaming charges.
  • Step 8: Turn on Data Roaming to start using your eSIM.
Step 1: Settings > Cellular
Step 2: Add Data/Cellular Plan/ Add eSIM
Step 3: Enter Details Manually
Step 4: Enter manual information
Step 5: Label your eSIM profile
Step 6: Set up Default Line
Step 7: Set your eSIM as Default Cellular
Step 8: Turn on Data Roaming

How to Use your eSIM on iPhone

After installation, to turn on eSIM on iPhone when landing in Singapore, you need:

  • Step 1: Go to Settings, and tap Cellular/Mobile Data (depending on your device)
  • Step 2: Choose your eSIM (under “Cellular Plans”) and switch on both the Turn On This Line (open Settings > Mobile/Cellular Data) and Data Roaming (open Settings > Mobile/Cellular Data > Mobile Data Options). 

Congratulations! Your plan has now been installed and is ready to use.